
Cutting Plexiglass with a Circular Saw: A Step-by-Step Guide
Plexiglass, also known as acrylic, is a versatile material used in a wide range of applications, from DIY projects to industrial manufacturing. While it can be cut with various tools, the circular saw offers a precise and efficient method. However, cutting plexiglass with a circular saw requires specific techniques and precautions to avoid damaging the material or causing injury.
Safety First
Before you begin, it’s crucial to prioritize safety. Here are some essential precautions:
- Wear protective gear: This includes safety glasses, gloves, and a dust mask to protect your eyes, hands, and lungs from flying debris.
- Work in a well-ventilated area: Plexiglass cutting can produce dust, which can be harmful if inhaled.
- Secure the plexiglass: Use clamps or a work table to hold the plexiglass firmly in place during cutting.
- Choose the right blade: A fine-toothed carbide-tipped blade specifically designed for cutting plastics is ideal for plexiglass.
Marking the Plexiglass
- Use a permanent marker: Clearly mark the cutting line on the plexiglass using a permanent marker.
- Consider the blade kerf: The kerf is the width of the cut made by the saw blade. Ensure your marking accounts for the kerf to achieve the desired final dimensions.

Setting Up the Circular Saw
- Adjust the blade depth: Set the blade depth slightly above the thickness of the plexiglass to prevent the blade from breaking through the bottom surface.
- Check the blade alignment: Ensure the blade is perpendicular to the cutting surface to avoid uneven cuts.
Cutting the Plexiglass
- Make a pilot hole: Drill a small pilot hole at the beginning of the cutting line to guide the saw blade.
- Start the saw: Turn on the circular saw and allow it to reach full speed before making the cut.
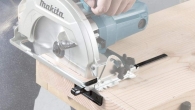
- Guide the saw: Slowly and steadily guide the saw along the marked line. Avoid applying excessive pressure, as this can cause the plexiglass to crack.
- Maintain a firm grip: Hold the saw firmly with both hands to ensure control and prevent the blade from wandering off the line.
- Avoid sudden movements: Sudden movements can cause the saw blade to bind or break.
- Complete the cut: Continue cutting until the blade has completely passed through the plexiglass.
Finishing Touches
- Sand the edges: Use fine-grit sandpaper to smooth the cut edges of the plexiglass.
- Remove any burrs: Carefully remove any burrs or imperfections using a utility knife or a sanding block.

Tips for Clean Cuts
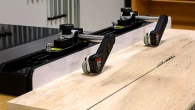
- Use a cutting guide: A cutting guide, such as a straight edge or a track saw, can help you achieve more precise and straight cuts.
- Practice on scrap material: Before cutting your final piece, practice on a scrap piece of plexiglass to get comfortable with the technique.
- Avoid overheating: Overheating can cause the plexiglass to warp or crack. Take breaks if the saw blade starts to feel hot.
Cutting Techniques
The choice of cutting technique for plexiglass depends on the desired shape, thickness of the material, and the tools available. Here are some common methods:
Hand Cutting
- Scoring Knife: For thin plexiglass sheets (up to 1/8 inch), a scoring knife can be used to create a deep groove along the desired cutting line. The sheet can then be snapped along the score line.
- Utility Knife: A utility knife with a sharp blade can also be used to score plexiglass, especially for thicker sheets. However, it may require multiple passes to cut completely through the material.
Power Tools
- Circular Saw: Circular saws are suitable for straight cuts in thicker plexiglass sheets. Use a fine-toothed carbide-tipped blade designed for cutting plastics.
- Jigsaw: Jigsaws are versatile tools that can be used for both straight and curved cuts in plexiglass. A jigsaw blade specifically designed for cutting plastics is recommended.
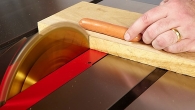
- Table Saw: Table saws offer precise and straight cuts, especially for larger plexiglass sheets. Use a fine-toothed blade and a push stick for safety.
- Dremel or Rotary Tool: Dremel tools or rotary tools with a cutting or scoring attachment can be used for intricate cuts or small details.
Other Methods
- Laser Cutter: Laser cutters are ideal for precise and complex cuts in plexiglass, especially for intricate designs or large-scale projects.
- CNC Router: CNC routers can be used to create highly accurate and detailed cuts in plexiglass, allowing for intricate shapes and patterns.
Tips for Cutting Plexiglass
- Use a cutting guide: A straight edge or a cutting guide can help ensure accurate and straight cuts.
- Avoid excessive pressure: Applying too much pressure can cause the plexiglass to crack or chip.
- Use a lubricant: A water-based lubricant can help reduce friction and prevent the blade from overheating.
- Practice on scrap material: Before cutting your final piece, practice on a scrap piece of plexiglass to get familiar with the technique.
- Consider the thickness: The thickness of the plexiglass will affect the cutting speed and the type of blade or tool you should use.
By selecting the appropriate cutting technique and following these tips, you can successfully cut plexiglass to your desired specifications.
Additional Considerations
- Cutting thick plexiglass: For thicker plexiglass, consider using a jigsaw or a router instead of a circular saw.
- Cutting intricate shapes: If you need to cut intricate shapes, a laser cutter or a CNC router may be more suitable.
- Plexiglass thickness: The thickness of the plexiglass will affect the cutting speed and the type of blade you should use.

Cleaning and Finishing
After cutting and shaping your plexiglass, the final steps involve cleaning and finishing to achieve a polished and professional look. Proper cleaning and finishing techniques will protect the material, enhance its appearance, and ensure its longevity.
Cleaning Plexiglass
- Gentle Cleaning: Use a soft, lint-free cloth dampened with warm water and a mild dish soap. Avoid harsh chemicals, abrasive cleaners, or paper towels, as these can scratch the surface.
- Stubborn Stains: For stubborn stains, try a specialized plastic or acrylic cleaner. Apply it sparingly and wipe gently with a soft cloth.
- Avoid Ammonia: Avoid cleaning solutions containing ammonia, as it can damage the plexiglass.
- Rinse Thoroughly: After cleaning, rinse the plexiglass with clean water to remove any soap residue.
- Dry Immediately: Dry the plexiglass thoroughly with a clean, soft cloth to prevent water spots.
Finishing Options
Once the plexiglass is clean, you may want to apply a finishing treatment to protect it from scratches, UV rays, and other environmental factors. Here are some common finishing options:
- Polishing: Polishing can help remove minor scratches and imperfections, giving the plexiglass a smooth, shiny finish. You can use a polishing compound and a soft cloth to achieve this.
- Buffing: Buffing is a similar process to polishing but involves using a buffing wheel or pad to create a high-gloss finish.
- Protective Coatings: Protective coatings, such as acrylic or polyurethane, can be applied to create a durable barrier against scratches, stains, and fading. These coatings can be applied by spraying, dipping, or brushing.
- UV-Resistant Coatings: If your plexiglass will be exposed to direct sunlight, consider using a UV-resistant coating to prevent yellowing and degradation.
Additional Tips
- Regular Cleaning: To maintain the appearance and condition of your plexiglass, clean it regularly with a mild soap and water solution.
- Avoid Harsh Chemicals: Avoid exposing plexiglass to harsh chemicals, such as solvents or cleaning agents that contain ammonia or alcohol.
- Store Properly: When storing plexiglass, protect it from scratches and dust by covering it with a soft cloth or plastic sheet.
By following these cleaning and finishing guidelines, you can ensure that your plexiglass projects look their best and last for years to come.
Cutting plexiglass with a circular saw can be a rewarding and efficient process when done correctly. By following the safety guidelines and techniques outlined in this article, you can achieve clean, precise cuts and create various projects with confidence. Remember to prioritize safety, practice, and choose the right tools for the job. With a little practice, you’ll be able to master the art of cutting plexiglass and unleash your creativity.




Leave a Reply