


Scroll Saw Basics for Beginners: Getting Started
Introduction to Scroll Saws
A scroll saw is a versatile tool ideal for intricate cutting work. It stands out for its ability to make precise cuts that other saws can’t match. Here’s what you need to know to start using a scroll saw.
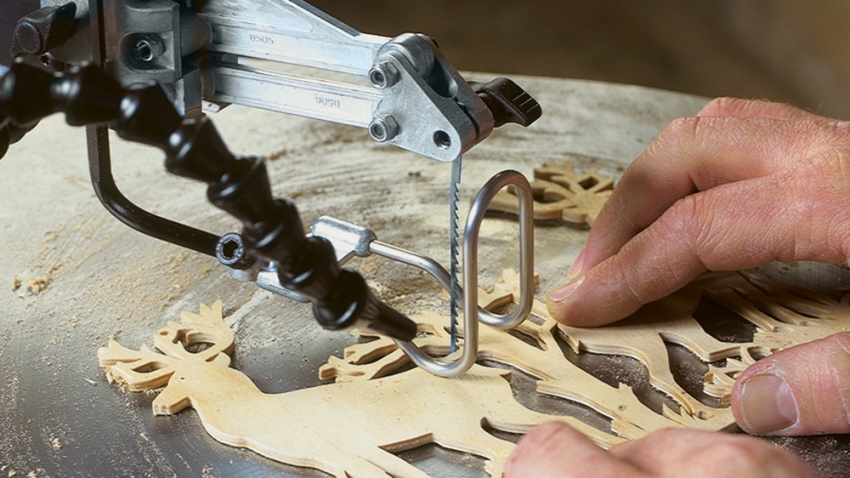
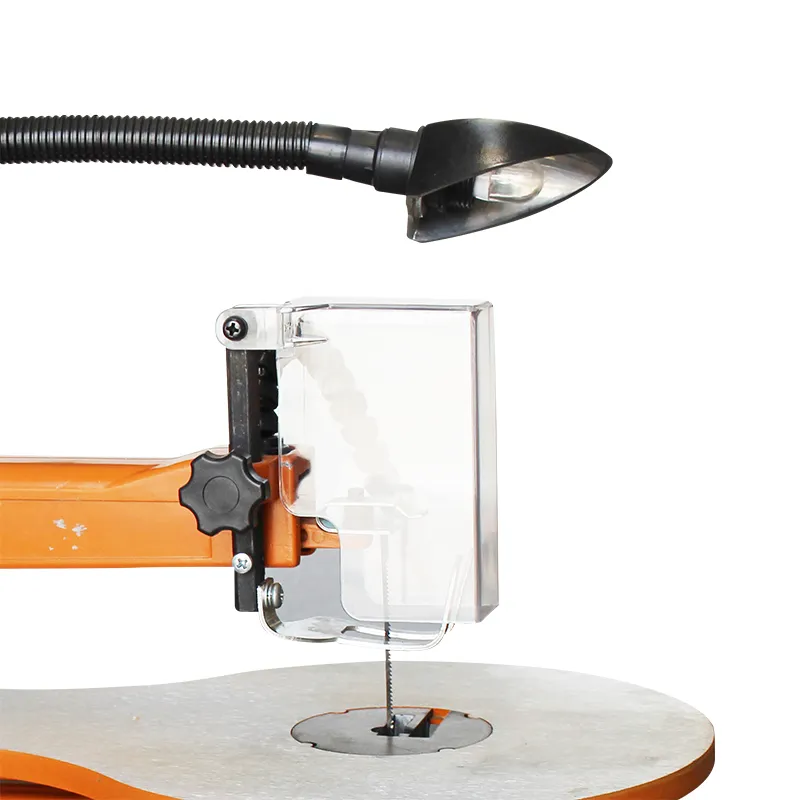
First, understand the parts of your scroll saw. The blade is the most crucial part, and it moves up and down to cut material. The table offers a steady surface for materials. The hold-down foot helps to keep the workpiece in place during cutting.
Next, know the types of cuts a scroll saw can make. You can cut sharp angles, curves, and complex patterns. This makes a scroll saw perfect for crafts, decorations, and detailed woodworking projects.
Before turning on the saw, always check the tension of the blade. It should be tight enough to resist bending. Using the right blade tension improves the accuracy of your cuts and extends the blade life.
Lastly, practice is key when learning how to use a scroll saw. Start with simpler designs and gradually move to more complex patterns as you gain confidence and skill. Always read the manufacturer’s manual for specific instructions and safety information related to your scroll saw model.
By following these steps and focusing on safety, you’ll be on the right path to mastering how to use a scroll saw for all kinds of creative and precise woodworking tasks.
Preparing to Use Your Scroll Saw
Getting started with a scroll saw involves preparation. Careful setup ensures you use the tool effectively and safely.
Selecting the Right Blades
Choosing the right blade is key. Consider these points:
- Material type: Harder materials need stronger blades.
- Complexity of design: Detailed patterns require finer blades.
- Thickness of workpiece: Thicker pieces might need larger blade sizes.
Diversify your blade collection to adapt to different projects.
Setting Up Your Work Area
A well-prepared work area maximizes efficiency and safety. Follow these steps:
- Stable surface: Secure your scroll saw on a level and stable surface.
- Ample room: Ensure you have enough space around your scroll saw.
- Good lighting: Bright lighting helps you see your work better.
- Tool placement: Keep other tools and materials within easy reach but not in the way.
Always clean your workspace before and after using your scroll saw. This helps to prevent accidents and maintains tool longevity.
Safety Measures and Best Practices
Ensuring safety is crucial when learning how to use a scroll saw. Here are best practices to keep in mind:
- Wear safety gear: Always use eye protection and dust masks. This protects you from sawdust and debris.
- Check your equipment: Before you start, inspect the scroll saw for any loose parts or damage.
- Use hold-downs: Keep fingers away from the blade. The hold-down foot prevents the workpiece from moving.
- Keep blades sharp: Dull blades make cutting harder and can be dangerous. Replace them regularly.
- Avoid distractions: Focus is key. Don’t use the scroll saw if you are tired or distracted.
- Secure materials: Before cutting, make sure the material is firmly clamped down.
- Learn the controls: Understand how to turn the saw on and off quickly in case of emergency.
- Start slow: Begin with a slower speed setting to gain control before moving on to faster cuts.
Follow these measures to ensure a safe and pleasant scroll saw experience. As you become more familiar with how to use a scroll saw, these safety practices will become second nature.
Fundamental Cutting Techniques
When you understand how to use a scroll saw, you’re ready to explore cutting techniques. Scroll saws are capable of performing a variety of cuts. Each type requires practice and skill. Here, we’ll go over the basics for making straight and curved cuts. These are fundamental for most scroll saw projects.
Straight Cuts
Straight cuts might seem simple, but they require a steady hand. Follow these steps for clean, straight lines:
- Mark your line: Use a pencil to draw a guideline on the material.
- Secure the material: Clamp down your workpiece to prevent movement.
- Choose the right blade: For thick materials, use a larger blade. For precision, a smaller blade works.
- Adjust the tension: Set the blade tension to avoid bending during the cut.
- Cut steadily: Feed the material into the blade smoothly, following your line closely.
Practice straight cuts on scrap pieces before moving to your project.
Curved Cuts
Curved cuts add elegance and detail to projects. Here’s how to achieve smooth curves:
- Draw your curves: Start by marking the pattern onto the material.
- Select a fine blade: Curved cuts usually need finer blades for tighter turns.
- Maintain control: Move the material slowly and consistently around the curve.
- Don’t force the blade: Let the blade cut at its own pace to avoid breaking.
With patience and steady hands, you’ll master curved cuts. Use scrap pieces to practice the motion needed for different curve types.

Understanding Patterns and Materials
When diving into scroll saw projects, the selection of materials and patterns plays a pivotal role. It’s crucial to match the complexity of the pattern with the right type of material for optimal results.
Choosing the Right Material
The success of your scroll saw work heavily depends on the material choice. Here are some tips to help you decide:
- Type of project: Determine if you’re making a decorative piece or something functional.
- Grain and texture: Woods with a uniform grain cut more smoothly and are ideal for beginners.
- Thickness: Thinner materials are easier to cut but may not suit all designs.
- Hardness: Softer woods like pine are great for practicing, while hardwoods like oak offer durability.
- Cost: Balance quality with your budget; start with less expensive materials if you’re new.
Experiment with various materials to understand how they react to the scroll saw blade.
Working with Patterns
Patterns are essential for intricate projects. Here’s how to approach them:
- Simplicity: Start with basic designs to build skill before attempting complex patterns.
- Size: Ensure the pattern size fits the material and doesn’t make handling difficult.
- Transfer: Use carbon paper or a transfer tool to accurately apply the pattern to your workpiece.
- Visibility: Make sure lines are clear and visible to follow with the scroll saw blade.
Practice cutting various patterns on scrap material to gain confidence and precision.
Maintenance Tips for Your Scroll Saw
Keeping your scroll saw in top shape is crucial for optimal performance. Here’s what you need to do:
- Regularly clean dust: After each use, clear away sawdust from the machine. Keep the air inlets and exhausts free from obstructions for proper air circulation.
- Lubricate moving parts: Apply oil to all moving components occasionally to ensure smooth operation. Check the manufacturer’s guide for the recommended type of oil.
- Check blade condition: Inspect blades for signs of wear or damage. Replace them as needed for precise cuts and safety.
- Tighten loose parts: Vibration can loosen screws and fittings over time. Regularly check and tighten them to avoid accidents or poor performance.
- Inspect the table: Ensure the table is level. A misaligned table can cause inaccuracies in your work.
These maintenance steps will help extend the life of your scroll saw and maintain the quality of your work. Remember to disconnect the saw from power before performing any maintenance.

Advanced Projects and Techniques
After mastering the basics of how to use a scroll saw, you can tackle advanced projects. Advanced techniques allow you to expand your skills and create intricate, professional-looking pieces. Here are some sophisticated projects and techniques you could explore:
Inlays
Inlays add depth and beauty to your work. You cut a shape in one material and insert another piece into the gap. Choose contrasting colors or grains for a striking effect.
Marquetry
Marquetry involves piecing together veneers of various woods to form decorative patterns or pictures. It’s like creating a jigsaw puzzle with wood.
Intarsia
Intarsia is similar to marquetry but uses thicker pieces of wood. It creates a 3D mosaic look and is great for wall art or decorative panels.
Bevel Cutting
With bevel cutting, you tilt the scroll saw table. This technique creates a beveled edge for decorative trims or joinery work.
Stack Cutting
Stack cutting is cutting multiple layers of material at once. This is efficient for making duplicates and saves time on repetitive patterns.
Compound Cutting
This advanced technique involves making two cuts at once—a horizontal and a vertical cut. It’s used to create complex 3D objects like figurines or ornaments.
Experiment with these advanced techniques on small projects before moving to bigger and more complex pieces. They require patience, but your skill will grow with each attempt. As you become more proficient, your scroll saw will become an even more invaluable tool in your woodworking arsenal.
Conclusion and Next Steps
You’ve made great strides in learning how to use a scroll saw. By now, you should feel comfortable setting up your workspace, choosing materials, and handling fundamental cutting techniques. Remember, safety first. Always wear protective gear and keep your focus sharp.
Your journey doesn’t end here. Practice is vital. Keep challenging yourself with new patterns and materials. Start with simple projects and gradually move on to more intricate work as your confidence grows.
Perform regular maintenance on your scroll saw to ensure it stays in peak condition. A well-cared-for tool will serve you reliably for many creative projects.
Ready for more? Try advanced techniques like inlays and intarsia. These skills will take your scroll saw work to the next level. And remember, patience and persistence are your best tools. Each cut, each project brings you one step closer to mastery.
Keep learning, keep crafting, and let your scroll saw skills flourish!


Leave a Reply